
Most developers would agree that accessibility is important. However only a few of us actively work on improving the accessibility of the apps and websites we build. Sure, we know that using semantic html is imporant and images should have alt text, but it's hard to build features you've not really experienced.
Have you never used a screen reader on your phone? If the answer is "no", then I challenge you to take the plunge and tackle one of the more challenging parts of working with accessibility - screen readers. That’s right, in just 10 minutes you can go from “what even is this" to a "fizz-buzz" level of capability with VoiceOver. Are you ready? Grab your phone and let’s go.
What even is VoiceOver?
VoiceOver is the name of the screen reader app for iPhone that allows users with visual impairments, dyslexia, and other challenges to effectively interact with their phone. The equivalent software on Android is called TalkBack, and on Windows there is Narrator. They are all similar, but not the same, so this tutorial focuses explicitly on VoiceOver on iOS.
What You Need
iPhone with FaceID and 10 minutes to spare!
Before You Start
The one thing I wished someone had told me the first time I tried VoiceOver: if VoiceOver starts reading stuff out in an endless stream (incoming notifications, calls, any text on the page) and you want it to just stop, so you could hear yourself think: tap once with two fingers (two-finger single-tap) anywhere on the screen. This will pause/resume the narration.
And most importantly: do not panic and start pressing the phone side buttons. For most phones these are used for emergency services. This is how you end up accidentally calling the police, which actually happened to a colleague!
Setup
Close all other apps on your phone. Find a quiet place so you can hear the VoiceOver.
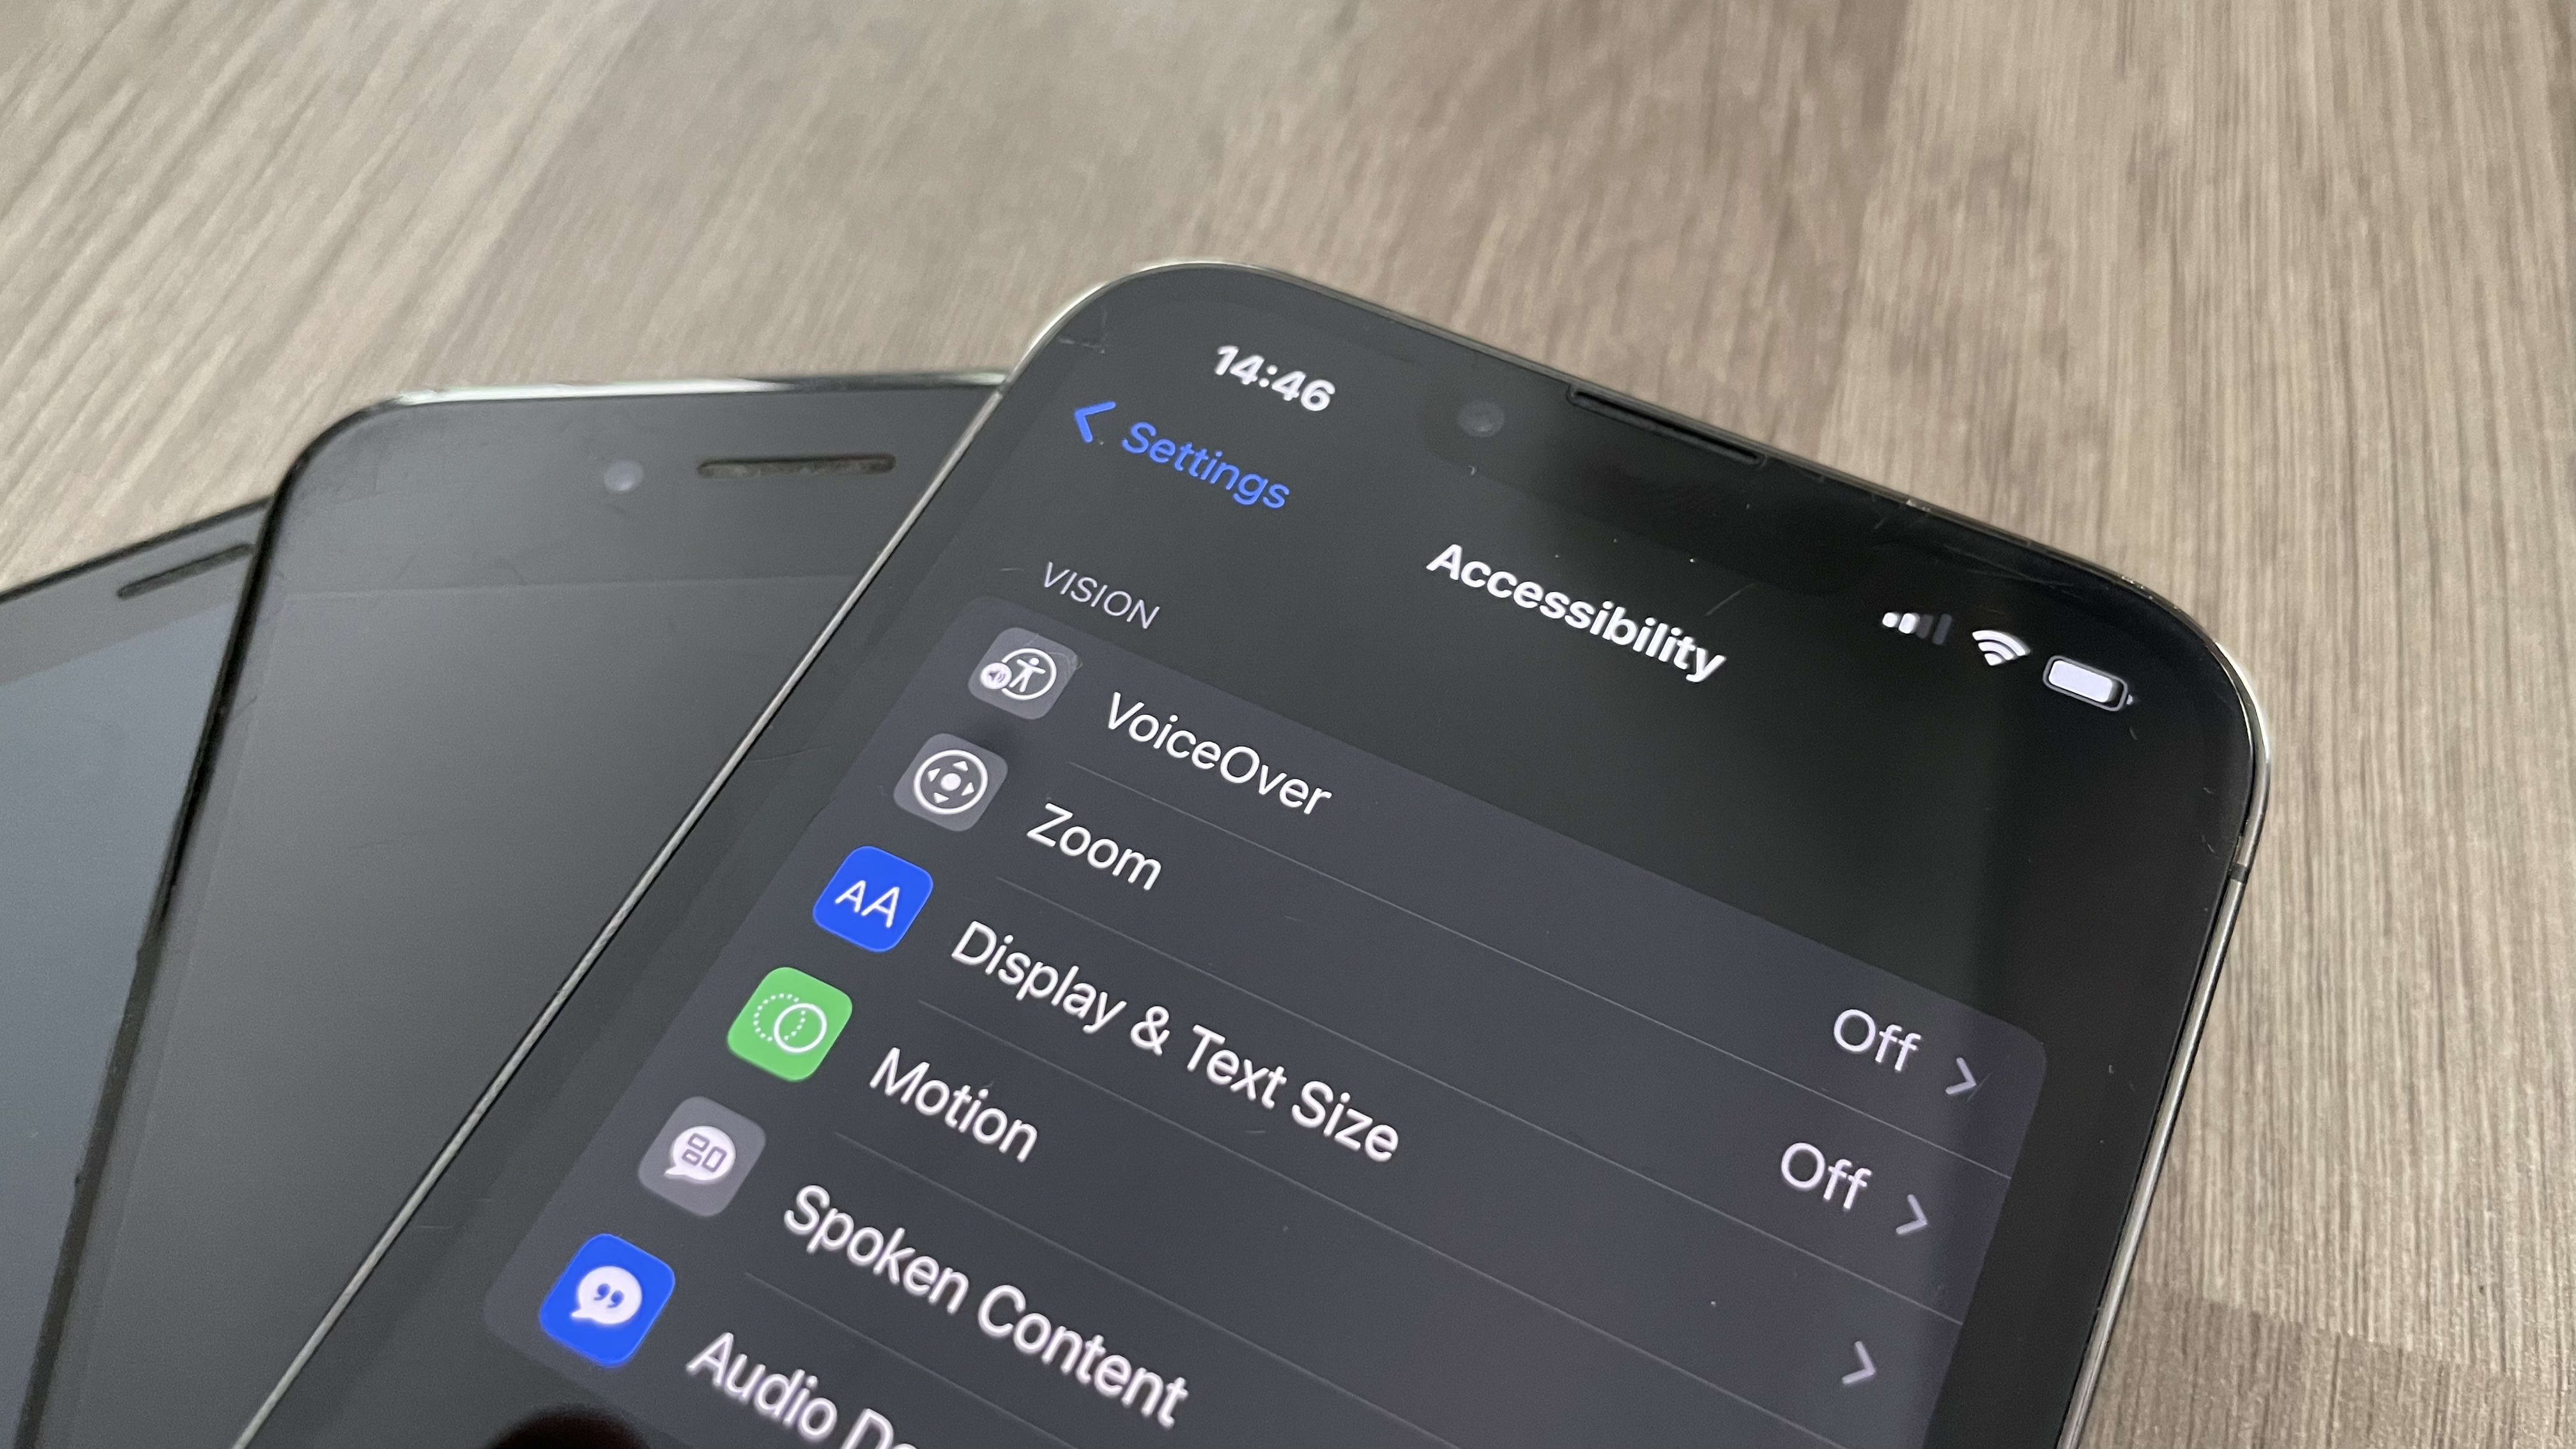
Exercise 1: Enable VoiceOver
- Open Settings → Accessibility → Voiceover
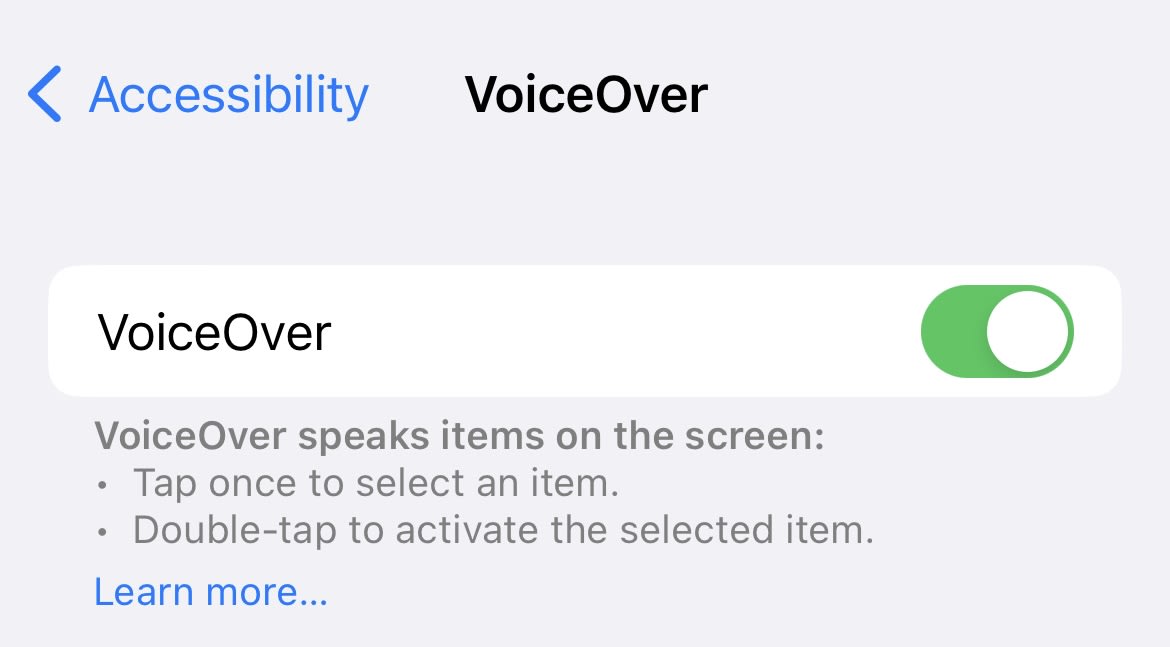
- Toggle VoiceOver on
- Two-finger single-tap anywhere on the screen to toggle speech
You’ll notice that as soon as you enable VoiceOver, it will start reading out text on the screen. It will also read out any incoming notifications which may or may not be what you want. The two-finger single-tap is your friend here and allows you to toggle the speech on and off.
Note: two-finger double-tap is for starting/stopping apps across iOS. So e.g. if you had Spotify or Audible running in the background, and used a two-finger double-tap, then it would toggle those apps on and off. This is why I suggested closing all other apps before enabling VoiceOver to prevent accidentally triggering them.
Exercise 2: Close VoiceOver
- Still on the VoiceOver page, one-finger single-tap (also referred to as "touch") on elements on the screen to have voiceover read them out. Remember you can use two-finger single-tap anywhere on the screen to toggle speech and stop voiceover when it’s reading out anything especially long
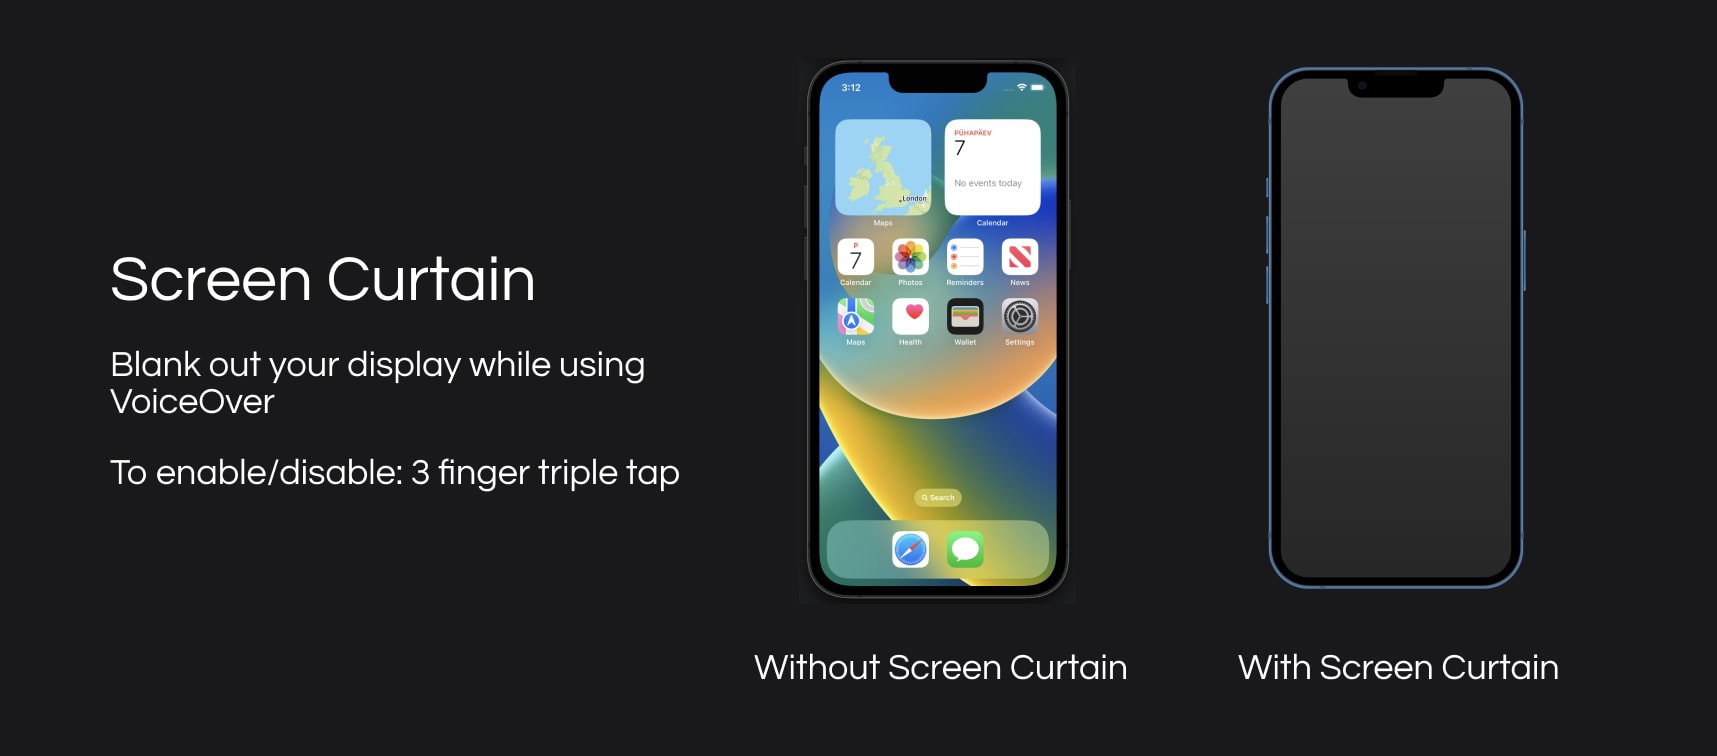
- You can practice not relying on vision for navigation by enabling Screen Curtain: three-finger triple-tap anywhere on the screen and you’ll see your whole phone screen will go dark. This will let you practice VoiceOver without peeking. Try sliding your finger across the screen to understand where content and intractable elements are positioned. Three-finger triple-tap again to turn Screen Curtain off.
- one-finger single-tap on the "VoiceOver" toggle. Notice it now has a border which means it is the active element
- one-finger double-tap anywhere on the screen. This will toggle the VoiceOver button. You will probably naturally try to double tap on the element itself since you can see and that’s what you’re used to and that will work just fine, but just be aware that with VoiceOver enabled, it is the action on the highlighted element that will get triggered, and not the action on the element under your finger.
Exercise 3: Practice Gestures
- Turn VoiceOver on again
- one-finger single-tap on the "VoiceOver Practice" button
- one-finger double-tap anywhere on the screen. This will open the VoiceOver Practice Screen. This is a place where you can practice voiceover gestures.
- Practice gestures and see what they do (see VoiceOver docs for more details):
| One Finger | Two Fingers | Three Fingers | |
|---|---|---|---|
| Single Tap | speak item | toggle speech | read item summary |
| Double Tap | activate | magic tap (see "extra credit" for more details) | toggle mute |
| Triple Tap | long press | show item chooser | toggle screen curtain |
| Swipe Up | previous rotor item | read from top | scroll down |
| Swipe Down | next rotor item | read all | scroll up |
| Swipe Left | move to previous item | move out | scroll right |
| Swipe Right | move to next item | move in | scroll left |
| Scrub | escape (dismiss an alert or return to previous screen) |
- Turn voiceover off
Exercise 4: Navigate From Lock Screen
Note: this is assuming you have a phone with Face ID!
- Turn VoiceOver on
- Press the power button on the side once to lock your phone
- Pick up your phone again. It will probably unlock immediately due to face ID, but you’ll find that the "swipe up to open" does not work like you’re used to. Try it now: if you swipe up quickly as I do, you’ll just hear a chime and nothing happens.
Now instead try this:
- swipe up from the bottom of the screen by about half an inch until you hear a small chime
- without taking your finger swipe up by a further half an inch until you hear a slightly different chime
- lift your finger up from the screen
This will open your phone. Try it a few times to make sure you are comfortable locking and unlocking your phone with VoiceOver.
- Turn voiceover off
Exercise 5: Settings and Controls
Remember how you swiped from the bottom to open lock screen? This is the gesture also used to open settings and app switcher. The first chime is just to say "yep, I’m listening". Then as you keep swiping, releasing after the second and third chimes will execute different actions.
| Swipe from bottom | Swipe from top | |
|---|---|---|
| First chime | nothing | nothing |
| Second chime | go back / home | open control center |
| Third chime | open app switcher | open notifications |
- Turn VoiceOver on
- Swipe from top until the second chime → this opens control centre
- Swipe from bottom until the second chime → you arrive back to the previous page
- Swipe from top until the third chime → this opens the notification centre
- Swipe from bottom until the second chime → you arrive back to the previous page
- Swipe from bottom until the second chime again → you arrive on the home screen
- Swipe from bottom until the third chime → this opens the app switcher
- From the app switcher, tap on the Settings page to select it
- One-finger double-tap to activate it and navigate back to the Settings page
- Turn VoiceOver off
It’s best to try each of these a couple of times until you feel comfortable with the gestures.
Exercise 6: Navigating Between Apps
Now it’s time to interact with some apps!
- Turn VoiceOver on
- Swipe from bottom until the second chime again → you arrive on the home screen
- If you have more than one page of apps, you can use three-finger swipe left or right to navigate between the pages
- Use touch (one-finger single-tap, or just slide) to select which app to use
- Select an app with touch and one-finger double-tap to open it
- You can now navigate inside the app using the gestures outlined in Exercise 3
- When you’re done, swipe from bottom until the third chime to open the app switcher
- Close the app from the app switcher (select with touch and swipe up to close)
- Select the settings screen from the app switcher
- Turn VoiceOver off
Extra Credit: Enable / Disable VoiceOver with Siri

If you have Siri enabled, you can enable/disable VoiceOver using Voice commands:
To Enable: "Hey Siri, enable voiceover"
To Disable: "Hey Siri, disable voiceover"
In both cases, a single press of the side power button will get rid of the overlayed UI elements so you can get on with whatever you were doing.
Extra Credit: Enable / Disable VoiceOver with Accessibility Shortcuts
Now that you’re more comfortable using VoiceOver, you could look at setting up VoiceOver Shortcuts
- Open Settings → Accessibility → Accessibility Shortcut. Here you can configure a custom action for "triple-click the side button".
- Tap on VoiceOver (you should see a blue tick next to it)
- Triple-click the side button to enable/disable VoiceOver
You can select more than one item for the Accessibility Shortcut, in which case the triple tap will open a bottom sheet with all your selected options.
Extra Credit: Magic Tap
The "Magic Tap" is a two-finger double-tap when VoiceOver is on, and it allows you to execute certain actions even when the app isn’t currently on the foreground. To test this out:
- Play a song on Spotify (or Audible, Apple Music)
- Turn VoiceOver On
- two-finger double-tap → and you’ll find the audio will toggle on/off regardless of what screen you were on when you tapped
It is worth noting that Magic Tap is configured by the specific app developer and is app-dependent. This means that each app could listen to the magic tap and perform any action the configure, which could make it a bit unpredictable.
In Summary
You made it to the end, great work! I hope you found the whole thing to be easier than you expected.
The next step is to enable VoiceOver again and complete the main happy-path flow in the app / website you are currently working on. Could you do it with screen curtain enabled? If not, then your product will need some accessibility tweaks. If you are using React Native, check out React Native AMA to help you do his on mobile.
If you learn better from a video, the official YouTube content from Apple gives provides a great overview.