
I woke up one morning thinking, “I should create more short-form video content on software-related manners. I’d like the recording process to be cheap, and I want the end result to have a little character.”
There are great native applications on the market for screen recording and editing, such as Camtasia, ScreenFlow, OBS Studio, and more. While tools like these include a whole host of powerful editing features, for short-form content that doesn’t require post-processing, they might be overkill. Since I spend my days developing for web browsers, I wanted to explore how far browser technology has come in the way of screen sharing and recording, and attempt to create a tool that would allow me to quickly create short-form technical video content with a little bit of flare.
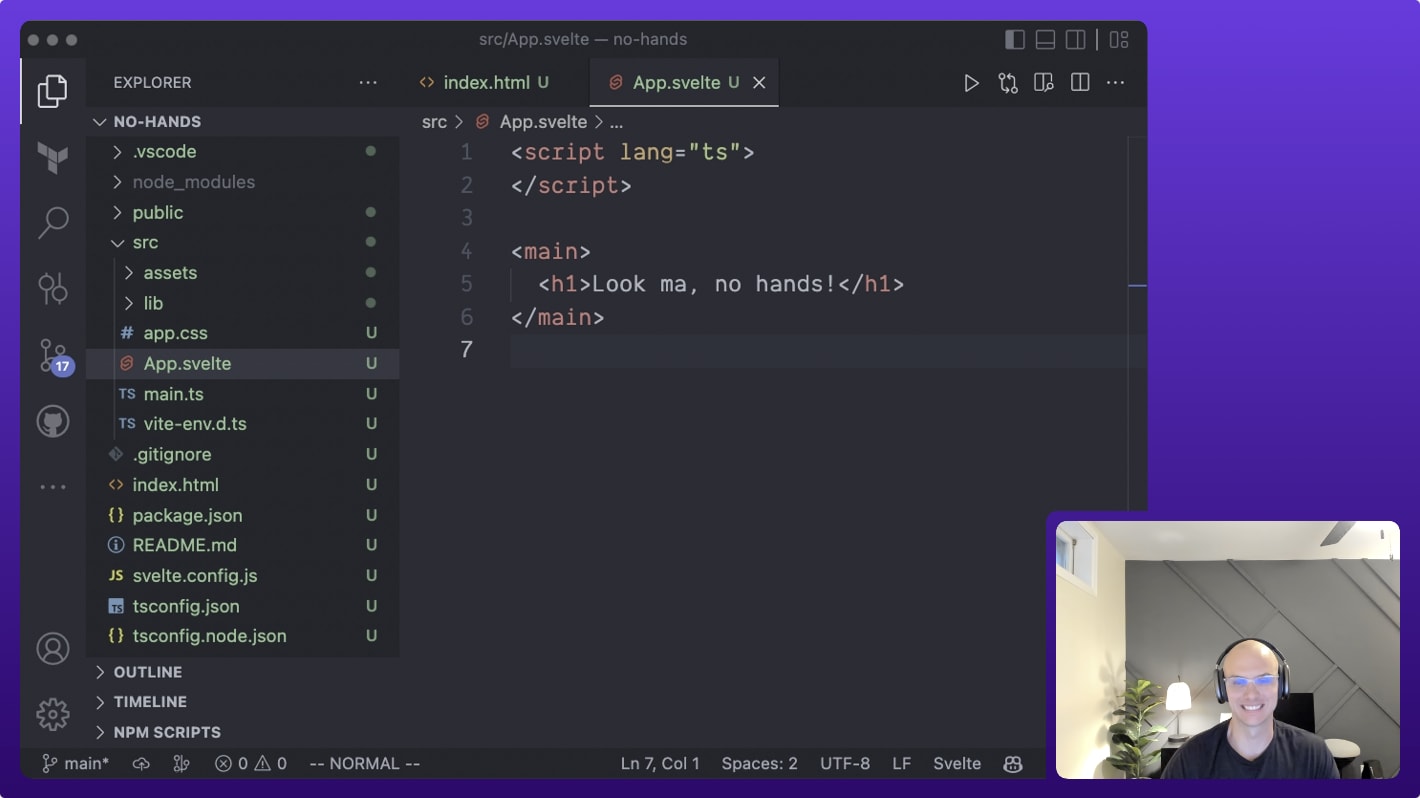
The end result: Clips, an open-source experiment in the screen capture/recording space (the code can be found at this GitHub repo). Here’s a sneak peak at what we built, and what we’ll be working towards throughout this post.
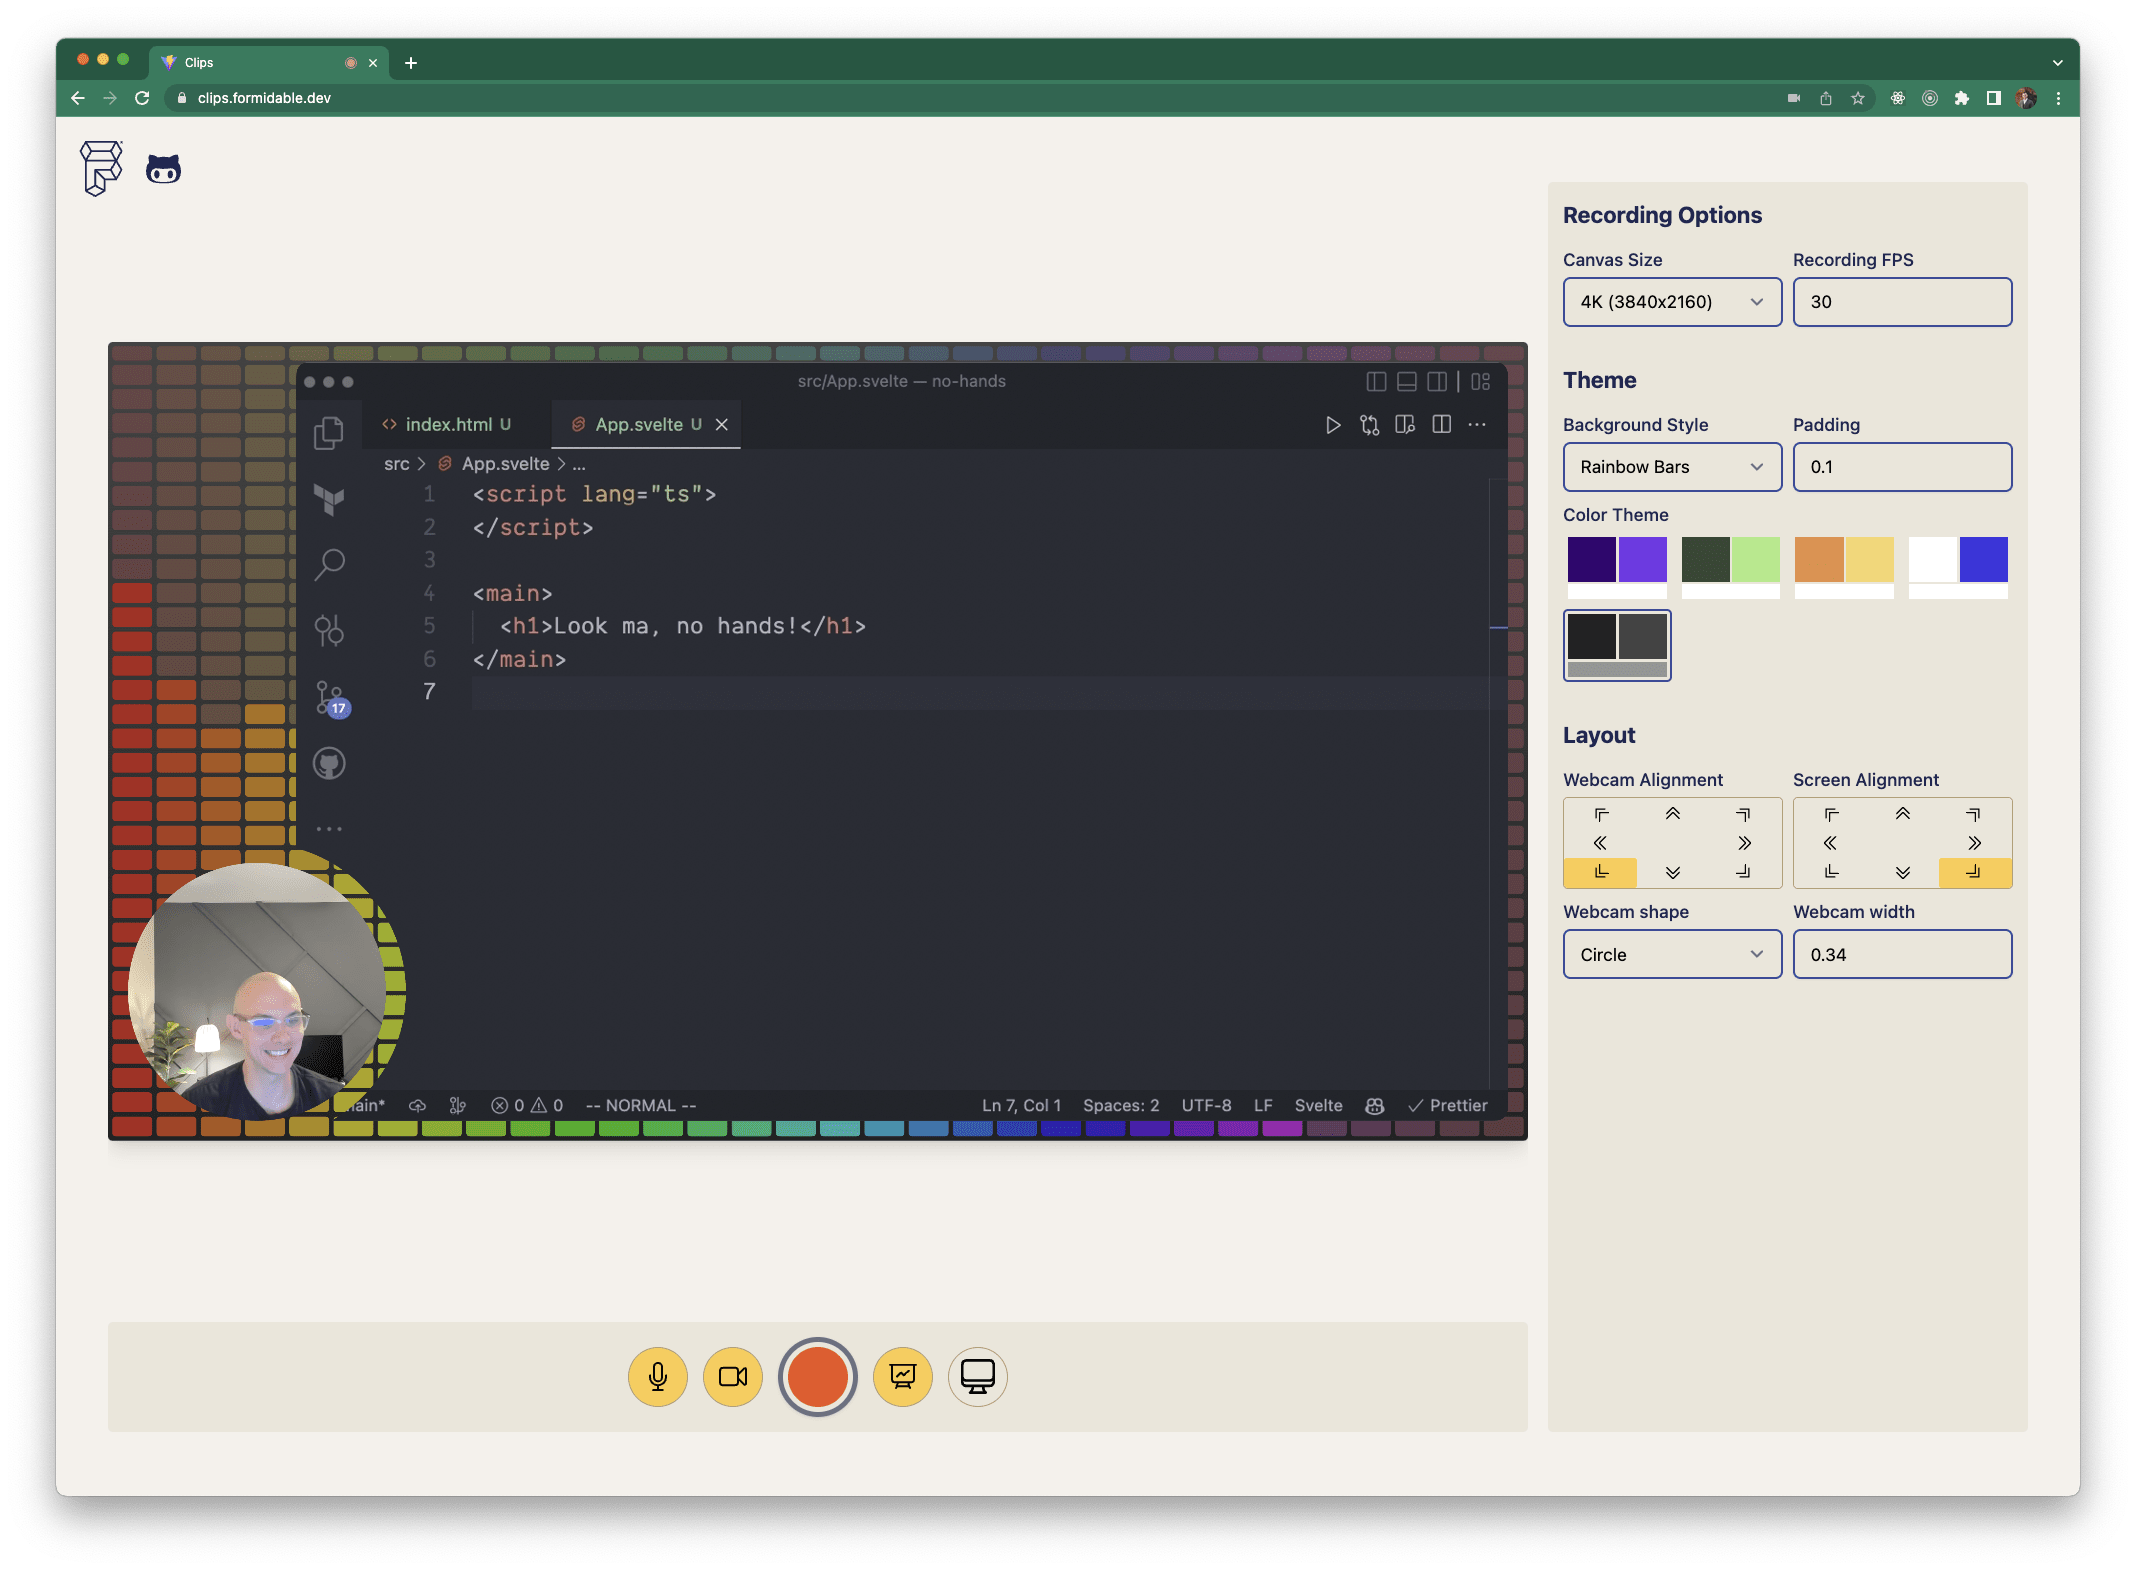
This experimental web app supports:
- capturing/sharing your screen/window;
- capturing your webcam;
- capturing your mic audio;
- adjusting the position/sizing of the captured screen/webcam on the video canvas;
- choosing from different background/layout options, including audio-visualization background;
- and recording the video in your browser.
And here’s the amazing part: all of this is powered by browser APIs using no external services! To keep this post from turning into a novel, I’ll omit a fair amount of details and just cover the basics needed to get you started on building your own screen recorder – but please do check out the source code if you’re interested in the dirty details!
Technical Overview
There’s a fair bit going on here, technically, so let’s start with a high-level diagram that outlines our input sources (screen share, webcam, and mic), how those input sources flow through the app – and how the output (a .webm video file) is generated from the input sources. (And yes, the output basically must be a .webm video due to browser limitations. See the section on mime/media type’s below for more details.)
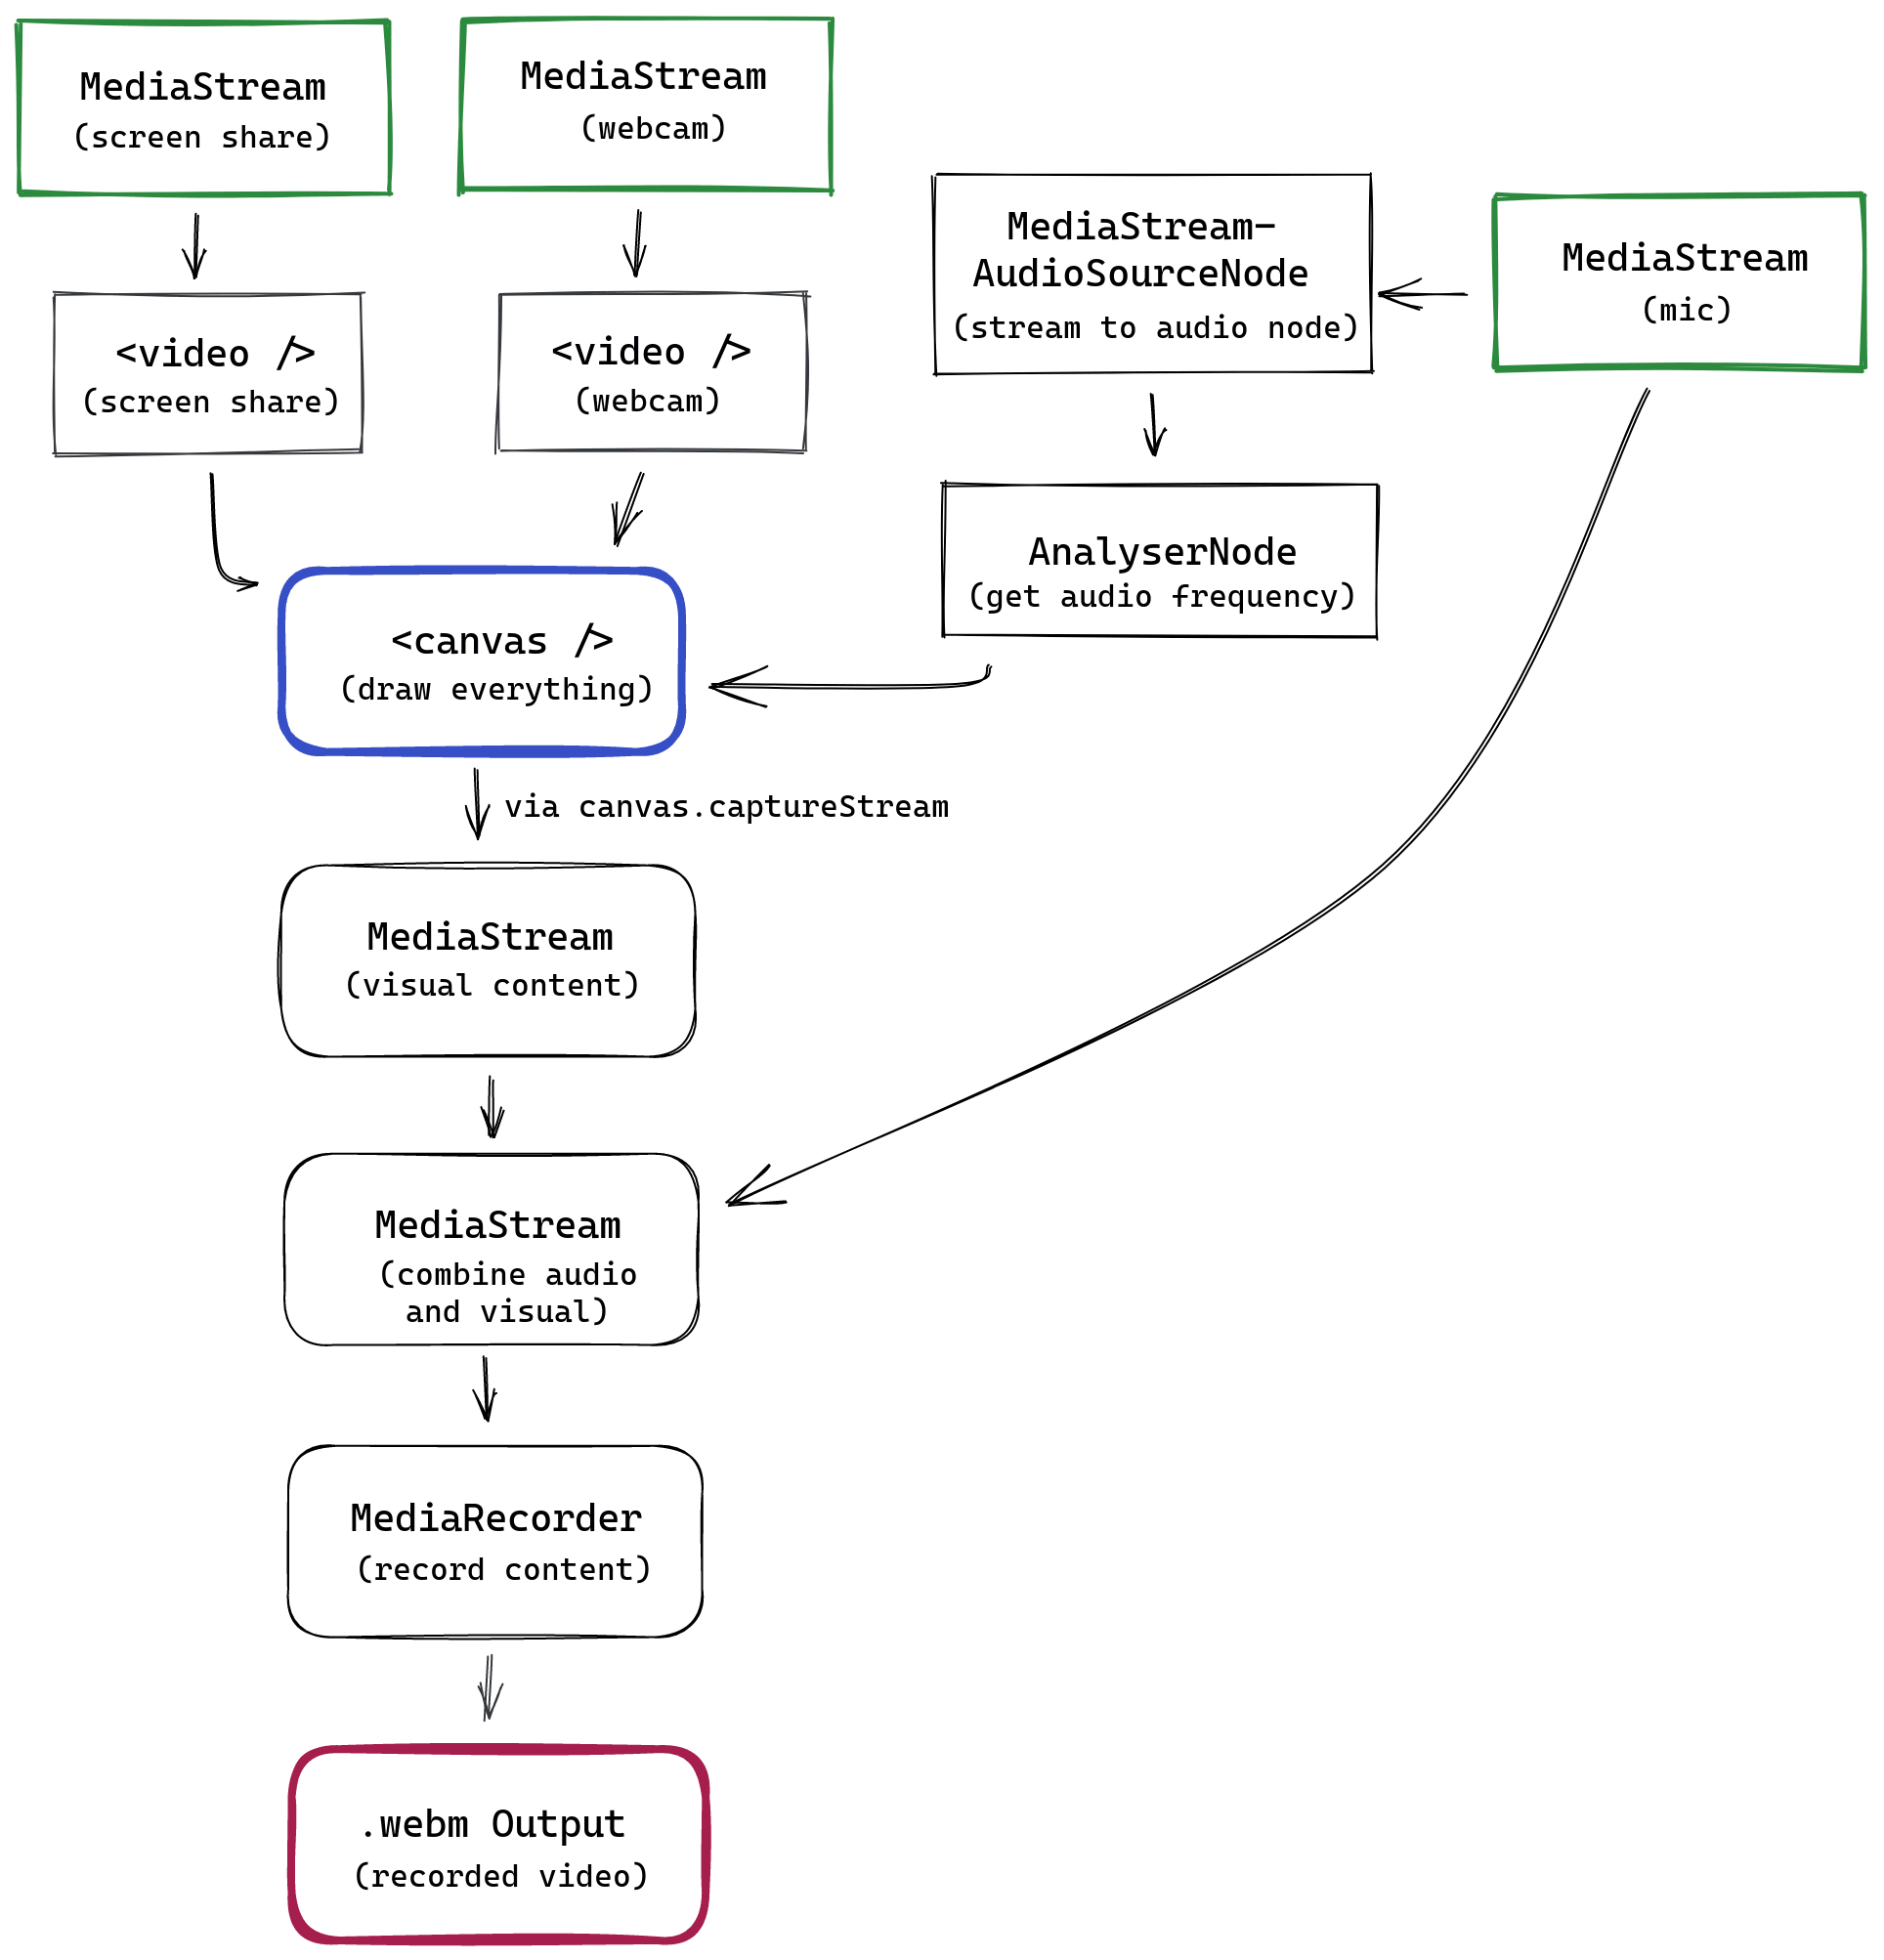
In this diagram, the green boxes represent input sources, the blue box with <canvas /> represents our HTML5 canvas that we’ll use to stitch/paint together our visual input sources, and the red box represents our final output – a .webm video file. Here’s a high-level overview of the workflow we’re working with:
- we use the
CanvasAPI to draw our visual content (blue box above); - we use various browser APIs to create “media streams” for our input sources, and use then use those sources to draw our video image on the canvas;
- we combine our audio media stream and visual media stream into a single, combined media stream;
- we use the
MediaRecorderAPI to record the combined media stream; - we put together a
Blobwith our recorded media content, and export that as a .webm video download.
There are a lot of technical details at each step here. In the subsequent sections, we’ll dive a bit deeper into some technical details from each step along the way.
Capturing the Screen
To allow the user to capture their screen we can use the MediaDevices.getDisplayMedia() method available to us on the navigator global in modern browsers. The MediaDevices APIs make this quite painless:
const captureScreen = async () => {
  // 💡 will prompt the user for a screen to share
  const screenShareStream = await navigator.mediaDevices.getDisplayMedia({
    // we only want video for now, but can easily specify other options
    video: true,
  });
}
Now we have reference to a MediaStream instance returned from getDisplayMedia, and we’ll eventually want to use this stream to draw the captured display onto our canvas. However, the canvas API does not handle any sort of video decoding – so we’ll pass this media stream into an HTML5 <video /> element as its srcObject, and then use a reference to this <video /> element to draw the video’s pixels onto our canvas via CanvasRenderingContext2D.drawImage.
// 💡 hold a reference to video element
let screenShareVideoRef: HTMLVideoElement;

const captureScreen = async () => {
  const screenShareStream = await navigator.mediaDevices.getDisplayMedia({
    video: true,
  });

  // 💡 connect stream to video element via srcObject
  if (screenShareVideoRef) screenShareVideoRef.srcObject = screenShareStream;
}
<!-- 💡 connect ref to video element, this example shows using Svelte -->
<video
  bind:this={screenShareVideoRef}
  autoplay
  playsinline
  muted
/>
We’ll skip some additional details here to avoid ballooning this post, but when we go to actually draw this video’s pixels onto our canvas, we’ll likely want to know its dimensions to do maths accordingly – so we can add a resize listener to our <video /> element and extract screenShareVideoRef.width and screenShareVideoRef.height and store those for later use.
Capturing the Webcam
The webcam selection in our screen recording app looks something like the following.
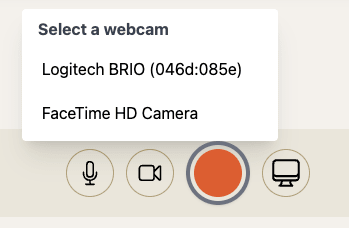
We want to allow the user to select which webcam they’d like to use, but in order to do this we need to show the user which webcams are available to choose from. In order to show the user which webcams are available, we first need to request permission to access the list of available webcams. Therefore, our workflow for webcam selection works something like this.
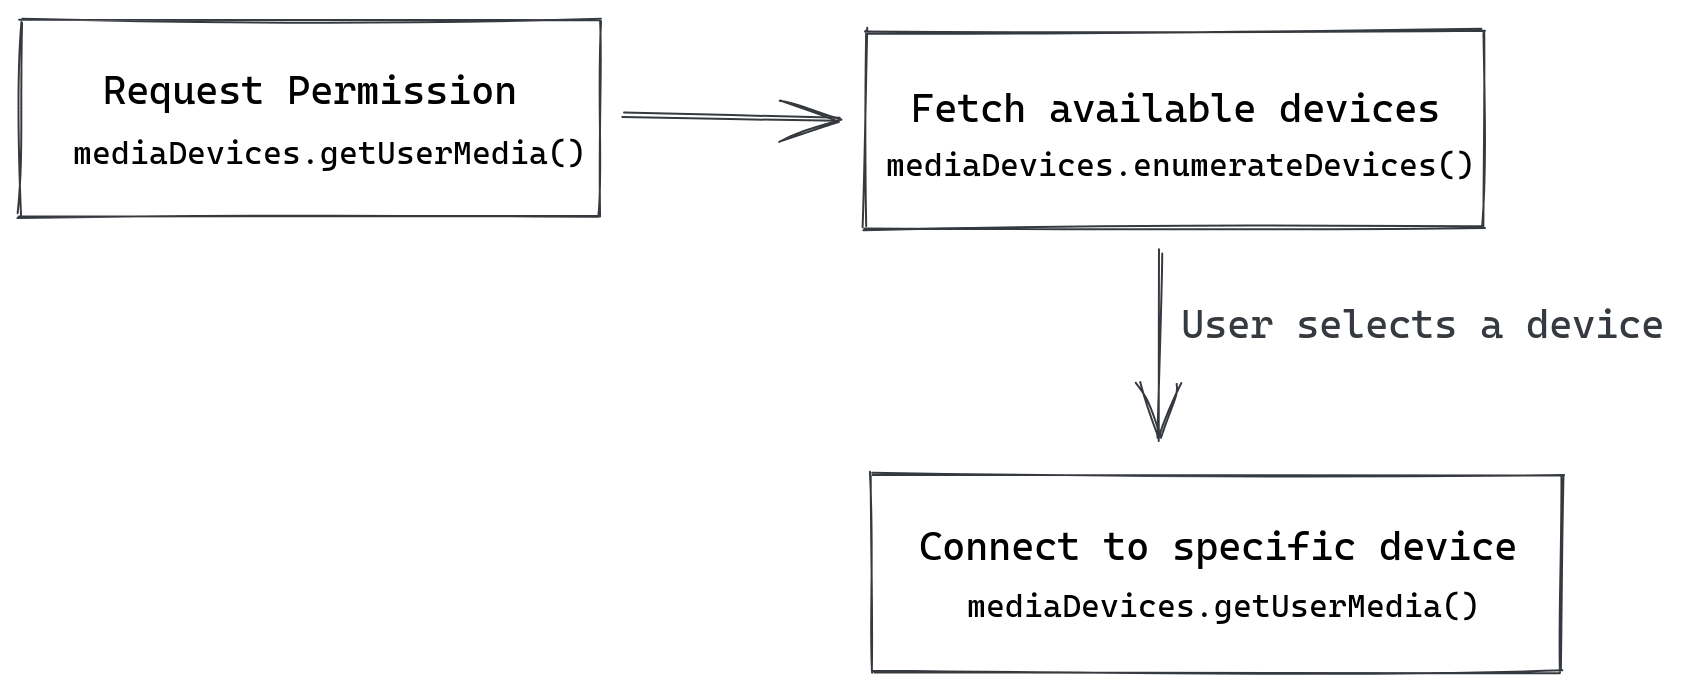
These calls are asynchronous, so there is async management to be tackled here – but here’s the gist of making this happen with code.
// list webcam devices
const listWebcamDevices = async () => {
  // 💡 first, ensure user's given permission to "enumerate" their video devices
  await navigator.mediaDevices.getUserMedia({
    video: true,
    audio: false
  });

  // 💡 fetch all devices, and then filter for videoinput devices
  const allDevices = await navigator.mediaDevices.enumerateDevices();
  return allDevices.filter((device) => device.kind === "videoinput");
}

// Connect to a specific device by passing `device.deviceId` from the device list.
const connectToWebcam = async (deviceId: string) => {
  const webcamStream = await navigator.mediaDevices.getUserMedia({
    // 💡 we want to connect to a specific device by specifying deviceId
    video: {
      deviceId: { exact: deviceId }
    }
  });
}
Similar to our screen share stream, we want to use the result of this video stream in our canvas, so we’ll need to pass this stream along to a <video /> element for decoding for later use in our canvas drawing.
let webcamVideoRef: HTMLVideoElement;

const connectToWebcam = async (deviceId: string) => {
  const webcamStream = await navigator.mediaDevices.getUserMedia(/* ... */);
  // use input stream as src for video element
  webcamVideoRef.srcObject = webcamStream;
}
<!-- connect ref to video element, this example shows using Svelte -->
<video
  bind:this={webcamVideoRef}
  autoplay
  playsinline
  muted
/>
Like with the screen share video, we’ll also want to grab webcamVideoRef.videoWidth and webcamVideoRef.videoHeight and store those values for when we go to do canvas drawing.
Capturing the mic
The microphone is another type of “user media”, so we can follow a similar pattern as with capturing the webcam. We (1) check for permission to fetch available devices, then we (2) fetch all devices and filter down to just the audio inputs, and then (3) allow the user to select a specific device and (4) prompt them for access to that device.
// list audio input devices
const listAudioInputDevices = async () => {
  await navigator.mediaDevices.getUserMedia({
    video: false,
    audio: true
  });

  // 💡 filter for audioinput devices
  const allDevices = await navigator.mediaDevices.enumerateDevices();
  return allDevices.filter((device) => device.kind === "audioinput");
}

// Connect to a specific device by passing `device.deviceId` from the device list.
const connectToAudioInput = async (deviceId: string) => {
  const micStream = await navigator.mediaDevices.getUserMedia({
    audio: {
      deviceId: { exact: deviceId },
      // 💡 we'll use some browser niceties to polish our audio input
      echoCancellation: true,
      noiseSuppression: true,
      autoGainControl: true,
    },
  });
}
Since our mic stream does not produce any sort of visuals (by itself, anyways) we do not need to attach this media stream to any sort of <video /> or <audio /> element.
Combining the screen and webcam streams
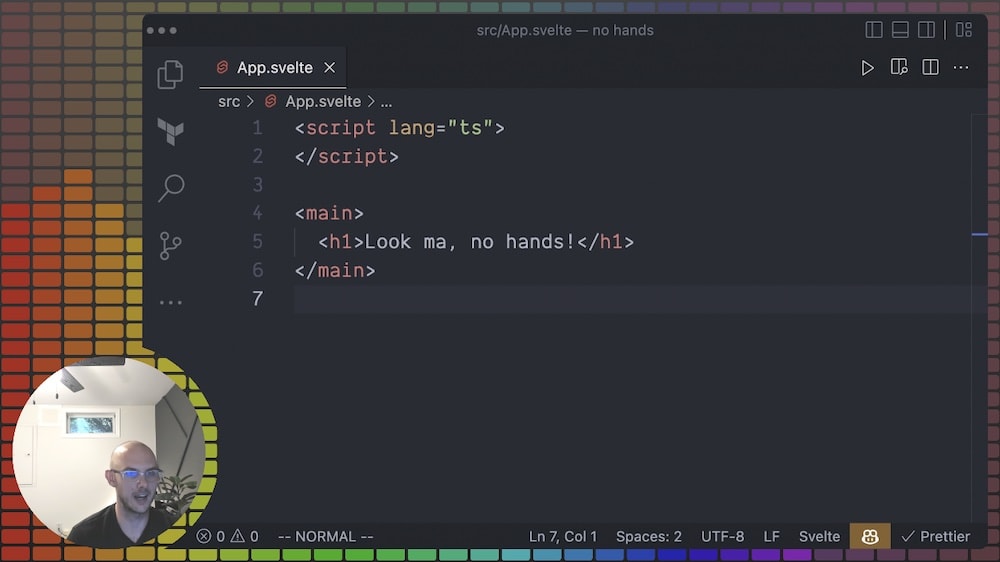
At this point we’ve got video streams for our screen share and webcam. We want to combine these two video streams together in a way that we can record the output and add nice visual effects. To do this, we’ll use HTML canvas and CanvasRenderingContext2D. We’ll use the drawImage method of our canvas context to paint our video streams onto our canvas. The end result will be something that looks like the following:
We’ll skip over a lot of maths here, but our general approach will be to set up a requestAnimationFrame loop for painting our video displays onto our canvas so that our canvas stays up to date with our video streams.
// reference to your canvas node, might vary depending on your setup
const canvas = document.querySelector("canvas");
// and get the 2D rendering context for the canvas
const ctx = canvas.getContext("2d");

// kick off the drawing process
const startDrawing = () => {
  requestAnimationFrame(loop);
}

// requestAnimationFrame loop. Each frame, we draw to the canvas.
const loop = () => {
  draw();
  requestAnimationFrame(loop);
}

// our drawing function
const draw = () => {
  // 👈 DRAWING COMMANDS HERE!
}
Once our “render loop” is in place, we can start issuing drawing commands in our draw function. We’ll keep it simple here, but check out the source code for Clips for inspiration on fancy drawing commands. We’ll use the screenShareVideoRef and webcamVideoRef video references from above to draw the video image into the canvas, as well as the canvas and ctx variables from the previous snippet.
const draw = () => {
  const { width, height } = canvas;

  // clear out the entire canvas and paint from scratch
  ctx.clearRect(0, 0, width, height);

  // draw our screen share in top-left
  // would need to do real math to get proper aspect ratio.
  ctx.drawImage(screenShareVideoRef, 0, 0, 500, 400);

  // draw our webcam in bottom right.
  // would need to do real math to get proper aspect ratio.
  ctx.drawImage(webcamVideoRef, width - 200, height - 100, 200, 100);
}
At this rate, we have the screen share and webcam feeds painted on our canvas! The sample code here won’t create a very pretty result – but by sprinkling on some canvas and math magic, you can customize this to your heart’s desire!
Audio Visualization via web audio
I decided I wanted to add a little bit of character to my screen recordings, so I added some audio visualizations to the background of the canvas. Something like the following.
The idea was to have an audio frequency visualization based on the mic input. To achieve this, we can use the Web Audio API’s AnalyserNode – which can take an audio source and provide frequency data over time. Omitting some details, we can set up our analyzer as follows.
// create our audio context
const audioCtx = new AudioContext();

// 💡 create an analyser node with some options set
const analyserNode = audioCtx.createAnalyser();
analyserNode.fftSize = 128;
analyserNode.minDecibels = -90;
analyserNode.maxDecibels = -15;

// 💡 turn our earlier mic MediaStream into an AudioNode and connect to analyser
const micSourceNode = audioCtx.createMediaStreamSource(micStream);
micSourceNode.connect(analyserNode);

// we'll hold our frequencies in a typed array
let frequencies = new Uint8Array(analyserNode.frequencyBinCount);
At this point we aren’t actually pulling frequency data – but we’re in a position to do so. We’ll go back to our draw function and grab frequency data at each frame, and use that frequency data to paint something to the canvas.
const draw = () => {
  const { width, height } = canvas;
  // ...

  // 💡 pull current frequency data from analyser node, into frequencies var
  analyserNode.getByteFrequencyData(frequencies);

  // let's loop through our frequencies and draw a vertical bar for each
  const barWidth = width / frequencies.length;
  for (let i = 0; i < frequencies.length; i++) {
    const x = i * barWidth;
    const y = (1 - frequencies[i] / 255) * height;

    ctx.fillRect(x, y, barWidth, height - y);
  }
}
You’ll likely need to add your own touch to pretty this up, but this will get you started! With frequency data, you can start to add all sorts of interesting audio-visualizations to your screen recording.
Creating a Recording
Once we have our pixels dancing on our canvas, and our microphone audio stream captured, we can start to stitch these together to create an actual recording. Something we could upload to, say, YouTube.
Modern browsers have some support for the MediaRecorder API which is an interface for recording media. The MediaRecorder API works by consuming a single MediaStream and outputting Blob chunks over time. We can then use those Blob chunks to create a video output.
If we go back to our original architectural diagram, the recording creation steps look something like the following.

We need to generate a MediaStream from our canvas element, which we can do via the canvas.captureStream method – and then combine that with our mic MediaStream to create a single combined media stream. To combine MediaStream instances, we extract out the MediaStreamTrack instances we want to combine together and pass them in an array to the constructor of MediaStream to create a new stream with those specific tracks.
// create a MediaStream from our canvas
// the `30` here is frames per second, feel free to set your own FPS
const canvasStream = canvas.captureStream(30);

// combine the canvas stream and mic stream (from above) by collecting
//  tracks from each.
const combinedStream = new MediaStream([
  ...canvasStream.getTracks(),
  ...micStream.getTracks()
]);
Now that we have a combined media stream, we can use the MediaRecorder API to record it. The general flow for using the MediaRecorder is roughly as follows:
- create a
MediaRecorderinstance; - register a callback to the
MediaRecorder.ondataavailableevent to capture emittedBlobs and stored thoseBlobchunks in an array; - when the recorder’s
onstopevent is called, use the collectedBlobchunks to create a video file to be downloaded. You can callMediaRecorder.stopmanually to stop a recording.
Let’s see this implemented in some code (again, some details are omitted).
const chunks: Blob[] = []; // create a recorder const recorder = new MediaRecorder(combinedStream, { // requested media type, basically limited to webm 🤦♂️ mimeType: "video/webm;codecs=vp9" }); // collect blobs when available recorder.ondataavailable = (evt) => { chunks.push(evt.data); } // when recorder stops (via recorder.stop()), handle blobs recorder.onstop = () => { const recordedBlob = new Blob(chunks, { type: chunks[0].type }); // do something with this blob... }
At this point, I need to point out two head-scratchers.
The MediaRecorder's mimeType option is limited
The MediaRecorder mimeType option supposedly allows you to specify a media type, but Chromium-based browsers and FireFox only seem to support webm. This means you’re more-or-less forced into creating .webm videos – a video format that’s not as widely adopted as other formats like .mp4. Certain platforms like Twitter do not allow .webm video uploads, where other platforms like YouTube and LinkedIn do. Many video editing softwares do not handle .webm videos, therefore it’s a struggle to do any sort of post-processing or editing on the generated video files.
Safari allows you to specify mp4 as a media type, and it’ll generate mp4 files – but Safari has other limitations when it comes to the getDisplayMedia API (it only lets you select your whole desktop when sharing, you can’t select a specific window).
Overall, this is a real bummer. If you’re trying to record media in a browser, plan to deal with the less-than-ideal .webm video format.
Missing metadata
The .webm video blobs generated from the MediaRecorder API in Chromium-based browsers are missing the duration video metadata – which means browsers/video players cannot properly seek these videos (because they don’t know how long the video is), and many platforms will reject them as uploads. For example, if you use the MediaRecorder API to generate a .webm video file that is 30 seconds long and try to upload it to LinkedIn – LinkedIn will reject the video with an error message along the lines of “This video is longer than 15 minutes.” What?
I have no idea why the generated video blobs are missing duration metadata (since it makes the generated files nearly useless), but… open source to the rescue. I was able to find a fix-webm-duration library that allows you to manually pass in a video duration and it’ll adjust the blob’s metadata accordingly. Therefore, to get a usable video file – you’ll need to manually track the start/end time of the video recording – and then monkey patch the duration metadata accordingly. This looks something like the following.
import fixWebmDuration from "fix-webm-duration";

// 💡 Helper to patch our blob
const patchBlob = (blob: Blob, duration: number): Promise<Blob> => {
  return new Promise(resolve => {
    fixWebmDuration(blob, duration, newBlob => resolve(newBlob));
  });
}

// ....

// when starting the recording, track the start time
let startTime: number;
recorder.onstart = () => {
  startTime = performance.now();
}

recorder.onstop = async () => {
  const recordedBlob = new Blob(chunks, { type: chunks[0].type });

  // 💡 manually compute duration, and patch the blob
  const duration = performance.now() - startTime;
  const patchedBlob = patchBlob(recordedBlob, duration);
}
At this point, our new patchedBlob should be usable.
Generating a download
Okay, so we’ve got a patched and usable blob available to us. To automatically download the blob as a video file, we’ll use the standard technique of using URL.createObjectURL to create an object URL, generating an anchor DOM element with this URL as its href, simulating a click on that anchor tag (which will trigger a download of the blob), and then discard the anchor tag.
recorder.onstop = async () => {
  const recordedBlob = new Blob(chunks, { type: chunks[0].type });
  const duration = performance.now() - startTime;
  const patchedBlob = patchBlob(recordedBlob, duration);

  // 💡 turn the blob into a data URL
  const data = URL.createObjectURL(patchedBlob);

  // 💡 generate a link, simulate a click on it
  const link = document.createElement("a");
  link.href = data;
  link.download = "recording.webm"; // 👈 give the file a name
  link.dispatchEvent(
    new MouseEvent("click", { view: window });
  );

  // 💡 don't forget to clean up!
  setTimeout(() => {
    URL.revokeObjectURL(data);
    link.remove();
  }, 500);
}
And there we go! After our recording finishes, we’ve got a .webm video file downloading to our Downloads folder!
Takeaways
With some limitations, we’re able to create a fairly interesting and capable screen recording application using only browser APIs. This approach works fairly consistently across the major browsers, although support for various media capturing and recording media types varies a bit between vendors. However, there’s still plenty of progress to be made on this front. For our use-case of creating a screen recording app, we run into hiccups like lack of standard media types for recording and incomplete recording metadata – which makes it hard to consider these APIs complete enough to be serious about creating a full-fledged screen recording/editing application solely in the browser.
Nevertheless, it’s quite exciting to see how far browser technology has come and what sort of whimsical feats can be achieved in just a web browser. This gives me hope for the future of web browser application development – where we can hope that the gap between browser and native application technologies continues to shrink.